How to Clear the WordPress Cache (Tutorial + Plugins)

On this page
Want this handled for you?
Get startedHow do you clear the WordPress cache?
Changes not showing? Clear WordPress cache layer by layer: browser, cache plugin, host, CDN, object cache and Elementor CSS, and know when not to.
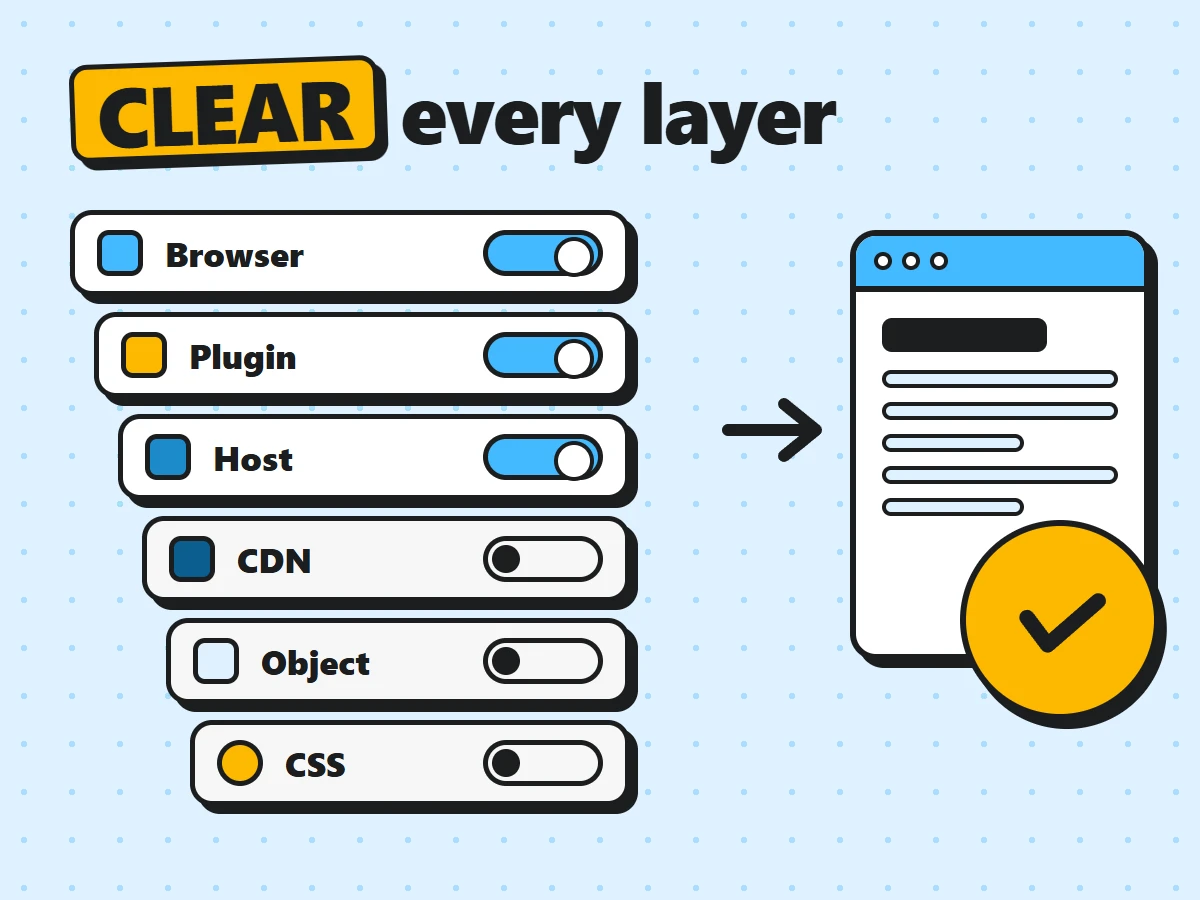
To clear the WordPress cache, you clear each layer that stores a copy of your pages: your browser, your cache plugin, your host’s server cache, your CDN and, if you use them, the object cache and your page builder’s CSS files. Most sites only have two or three of these layers, each with its own “clear” or “purge” button. Work through them from the inside out and your change will show up for everyone.
What is cached on a WordPress site?
A cache is a saved copy of something that took work to build. Without caching, WordPress runs PHP and queries the database every time someone opens a page. With caching, it builds the page once, saves the result and hands that copy to the next visitor. That’s why cached sites feel fast.
The catch is that a saved copy can go stale. You change a headline, a price or a colour, but visitors keep getting the old copy until the cache expires or someone clears it. And because a typical site has several caches stacked on top of each other, clearing just one of them often isn’t enough.
Here are the layers you’re likely to meet, from closest to the visitor to closest to WordPress:
- Browser cache: your own browser keeps images, CSS and JavaScript files so it doesn’t download them again.
- CDN cache: a content delivery network such as Cloudflare keeps copies of your files (and sometimes whole pages) on servers around the world.
- Server or host cache: many hosts run their own page cache on the server, outside WordPress.
- Page cache plugin: a plugin saves finished pages as static files.
- Object cache: stores the results of database queries in memory, often with Redis or Memcached.
- Builder CSS: page builders such as Elementor write their styles into CSS files that can fall out of date.
Mozilla’s guide to HTTP caching is a good read if you want to know how browsers and CDNs decide how long to keep a file.
Clear your browser cache first
Before you clear the WordPress cache on the server, rule out your own browser. It’s the most common reason a change “doesn’t show”, and it’s the quickest to fix.
Start with a hard refresh, which reloads the page and asks the server for fresh files:
- Windows and Linux (Chrome, Edge, Firefox):
Ctrl + Shift + RorCtrl + F5 - Mac (Chrome, Edge, Firefox):
Cmd + Shift + R - Safari on Mac:
Cmd + Option + R
If that doesn’t do it, open the page in a private or incognito window. A private window starts with an empty cache and no logins, so it shows you roughly what a new visitor sees. If the change appears there, the problem was only ever your browser.
To clear the browser cache completely, open your browser’s settings and look for the privacy section. In Chrome, for example, it’s Settings → Privacy and security → Delete browsing data, then tick Cached images and files. You don’t need to delete cookies or history for this, and leaving cookies alone keeps you logged in.
One thing to remember: clearing your own browser only fixes it for you. Your visitors still have their own copies, which is why the server-side layers below matter.
Clear the WordPress cache in your cache plugin
If you use a caching plugin, it’s the layer you’ll clear most often. Almost every one of them adds a clear or purge option to the admin bar at the top of the screen when you’re logged in, plus a button on its own settings page. The exact labels change between versions, so treat these as a guide rather than gospel:
- WP Rocket: hover over WP Rocket in the admin bar and choose the option to clear (and preload) the cache. The same button sits on the plugin’s dashboard under Settings → WP Rocket.
- LiteSpeed Cache: hover over the LiteSpeed icon in the admin bar and choose Purge All. More precise purge options live under LiteSpeed Cache → Toolbox.
- W3 Total Cache: use Performance → Purge All Caches in the admin bar, or the button to empty all caches on the plugin’s dashboard.
- WP Super Cache: click Delete Cache in the admin bar, or go to Settings → WP Super Cache and use the delete cache button there.
- WP Fastest Cache: use the clear cache option it adds to the admin bar, or the delete cache tab on its settings page.
- Autoptimize: this one caches combined CSS and JavaScript rather than whole pages. Use its delete cache option in the admin bar after changing styles or scripts.
If your plugin offers both “clear this page” and “clear everything”, start with the single page. It’s gentler on the server, and on a big site a full purge means every page has to be rebuilt for the next visitor.
Many cache plugins also clear the relevant pages on their own when you update a post. So if you’ve just edited a blog post and the change isn’t showing, the culprit is more likely another layer (or your browser) than the plugin.
Clear your host’s server cache
Many managed WordPress hosts cache your pages on the server itself, using tools such as Varnish, Nginx caching or LiteSpeed’s built-in cache. This happens outside WordPress, so your cache plugin may not know about it, and clearing the plugin alone can leave the host’s copy in place.
Hosts usually give you a way to clear it in one of three places:
- The WordPress admin bar. Many managed hosts install a small plugin of their own that adds a “Purge cache” or “Clear cache” button to the top bar.
- The hosting control panel. Look for a section called caching, performance or speed, with a button to flush or purge the cache for your site.
- A host-made optimisation plugin. Some hosts ship their own speed plugin, and its settings page has the purge button.
Not sure whether your host caches pages at all? Check its help centre for “cache”, or ask support. It’s worth knowing, because running a second page cache plugin on top of a host cache can cause the very stale-page problems you’re trying to fix. Most hosts with built-in caching recommend which plugins to use, or avoid, alongside it.
Purge your CDN cache
A CDN stores copies of your images, CSS and JavaScript on servers close to your visitors, and some set-ups cache whole pages too. If you’ve replaced an image or edited a stylesheet and visitors in other countries still see the old version, the CDN is the likely reason.
In Cloudflare, open your site in the dashboard and go to Caching → Configuration. You’ll find two choices:
- Custom Purge clears specific URLs, such as one image or one stylesheet. Use this when you know what changed.
- Purge Everything clears every cached file for the domain. Your server then has to serve everything fresh for a while, so expect a brief spike in load on a busy site.
On the same page, Development Mode temporarily bypasses Cloudflare’s cache while you work, and switches itself off after a few hours. Cloudflare’s own guide to purging cached content covers the other purge types.
Other CDNs work the same way: there’s a purge or invalidate option in their dashboard, and some offer a WordPress plugin that purges automatically when you publish.
Flush the object cache
The object cache is less visible than the others. Instead of saving whole pages, it saves the results of database queries and other expensive work, so WordPress doesn’t have to repeat it. By default, WordPress keeps this cache only for the length of a single page load. A persistent object cache, usually Redis or Memcached, keeps it in memory between requests, which speeds up busy sites and online shops a lot.
When it goes stale, the symptoms are odd: a setting you saved appears not to stick, a menu shows an old item, or a WooCommerce product shows the wrong stock count. To flush it:
- If you use a plugin such as Redis Object Cache, its settings page (often under Settings → Redis) has a flush button.
- Many hosts that provide Redis put a flush button in the hosting panel.
- With WP-CLI, run
wp cache flush.
If you don’t know whether you have a persistent object cache, check Tools → Site Health → Info. Site Health also suggests one on hosts that support it. Developers can read how the API works in the WP_Object_Cache reference.
Regenerate Elementor CSS
Page builders add one more layer. Elementor, for example, writes each page’s styles into CSS files in your uploads folder. After a plugin update, a site migration or a change to global colours and fonts, those files can fall out of step, and the page looks broken or keeps old styling even after every other cache has been cleared.
The fix is built in. Go to Elementor → Tools and, on the General tab, click the regenerate button (labelled Regenerate CSS & Data or Regenerate Files & Data, depending on your version). Elementor deletes its generated files and rebuilds them the next time each page loads. Then clear your page cache and CDN, because they may still hold the old CSS.
Every WordPress cache layer at a glance
Use this table to work out which layers your site has and where to clear each one.
| Layer | Where to clear it | Typical sign it’s stale |
|---|---|---|
| Browser | Hard refresh, or browser settings | Change shows in a private window but not your normal one |
| Cache plugin | Admin bar or the plugin’s settings page | Logged out, you see the old page; logged in, you see the new one |
| Host cache | Admin bar button or hosting control panel | Old page persists after clearing the plugin |
| CDN | CDN dashboard (Cloudflare: Caching → Configuration) | Old images or CSS, often only in some regions |
| Object cache | Redis plugin, hosting panel or wp cache flush | Saved settings, menus or stock levels look wrong |
| Elementor CSS | Elementor → Tools → General | Layout or styling broken after an update or migration |
When to clear the WordPress cache, and when not to
Clearing the WordPress cache is safe: it never deletes your content, only saved copies of it. But it isn’t free either. After a full purge, the next visitors to each page wait while it’s rebuilt, and on a busy site that extra work can slow the server down for a few minutes.
Good times to clear the cache:
- After changing your theme, menus, widgets or global styles
- After updating plugins that affect the front end, or after a WordPress core update
- After replacing an image or file that keeps the same file name
- After moving the site to a new domain or server
- When you’re troubleshooting a front-end problem and need to rule caching out
Times to hold off:
- During a traffic peak, such as a sale or a newsletter send. Purge a single page instead of everything, or wait.
- Several times an hour “just in case”. If you clear the cache over and over, your visitors never get the speed benefit.
- To fix a slow site. Clearing the cache makes the next page loads slower, not faster. A slow site needs a proper look at hosting, plugins and images. Our guide to WordPress debug mode helps when the problem is an error rather than a stale page.
My change still doesn’t show: troubleshooting
If you’ve made a change and it won’t appear, work through this list in order. It goes from the most likely cause to the least likely.
- Check you saved and published. It sounds obvious, but a draft, a scheduled post or an unsaved builder session explains a lot of “cache” problems. Open the editor and confirm the change is there.
- Open the page in a private window. If it’s right there, only your browser is stale. A hard refresh fixes it.
- Compare logged in and logged out. Most cache plugins skip caching for logged-in users. If you see the new version while logged in but not in a private window, a page cache (plugin or host) is serving the old copy.
- Clear from the inside out. Clear the object cache and Elementor CSS first, then the cache plugin, then the host cache, then the CDN. Clearing the CDN first can let it fetch and store the old version again from a cache that hasn’t been cleared yet.
- Check you’re editing the right place. A change to a parent theme can be overridden by a child theme, a page’s own settings, or a template in your page builder. Text in a header or footer may live in a builder template rather than in the page.
- Check the file name. If you replaced an image or CSS file with a new one of the same name, some caches won’t notice. Uploading it with a new name is often the fastest fix.
- Wait a few minutes. CDNs and some host caches take a short while to finish purging across all their servers.
If none of this works, temporarily deactivate the cache plugin, turn on Cloudflare’s Development Mode if you use it, and test again. If the problem stays with caching out of the way, it isn’t a cache issue at all, and it’s time to look at the theme, a plugin conflict or a PHP error.
The bottom line
When you clear the WordPress cache, think in layers rather than in one button. Rule out your browser first, then clear the cache plugin, the host cache and the CDN, with the object cache and builder CSS when the symptoms point there. Clear on purpose, after real changes, rather than out of habit. And if keeping caching, speed and updates in order is a job you’d rather not do yourself, our WordPress speed optimisation service can help.
Frequently asked questions
Yes. Clearing the cache only deletes saved copies of your pages and files, never your posts, settings or media. The only cost is that the next page loads are a little slower while the cache rebuilds.
Only when you need to: after design changes, plugin or theme updates, or when a change isn’t showing. Most cache plugins clear the right pages automatically when you edit a post, so day to day you rarely have to.
Most cache plugins don’t cache pages for logged-in users, so you see the live version while visitors see the cached one. Clear the page cache, then check in a private window to see what visitors get.
It’s a good habit, especially after updating your theme or plugins that change how pages look. Clear your page cache and, if you use Elementor, regenerate its CSS too.
Yes. Every Jompom plan covers WordPress core, plugin and theme updates, cloud backups, uptime monitoring and security scans, with a report for every task, and fixes like stale caches are handled by a WordPress expert. See the plans.